Introduction to John Deere Tractors
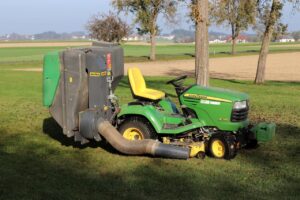
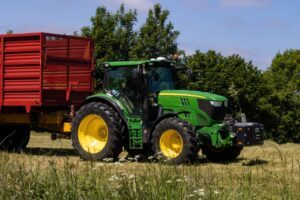
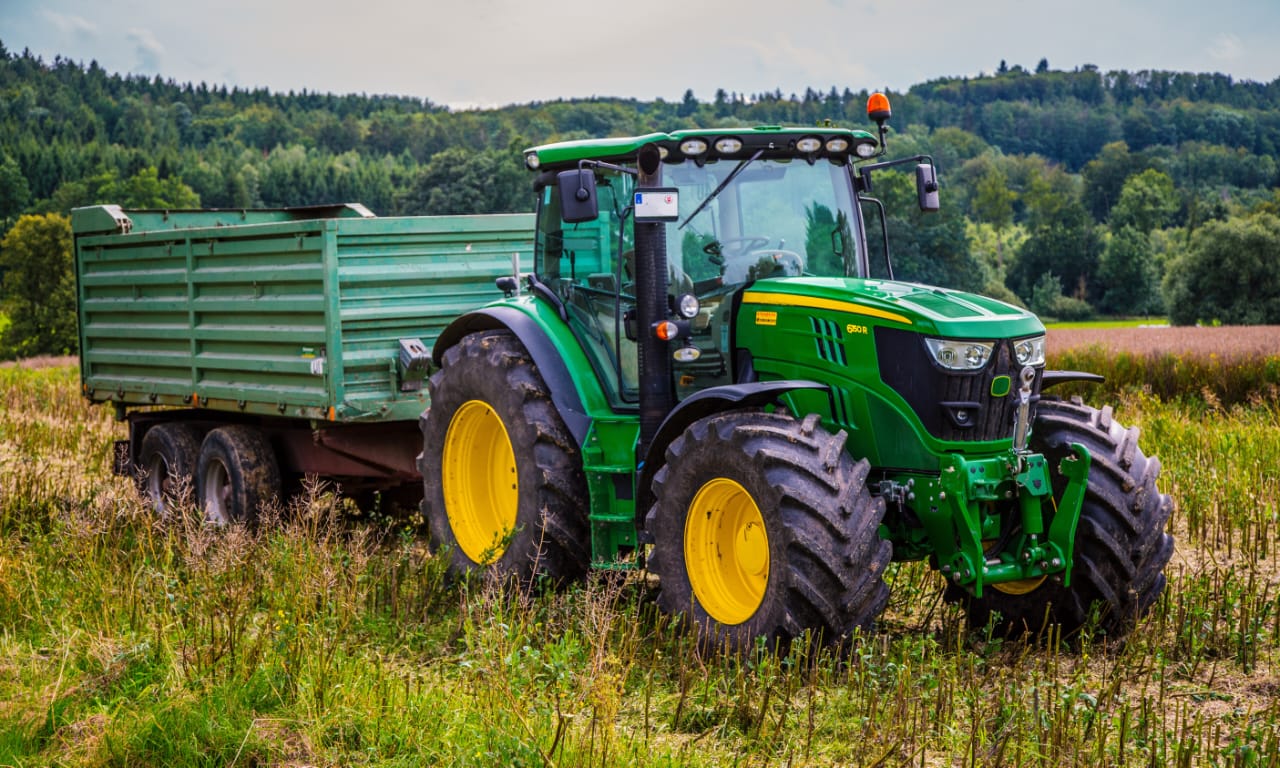
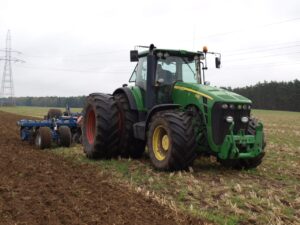
John Deere is a renowned name in agriculture, construction, and landscaping equipment, offering a wide range of tractors that cater to various farming and industrial needs. With a legacy of over 180 years, John Deere tractors are known for their reliability, durability, and cutting-edge technology. Whether you need a compact utility tractor for small farm tasks or a heavy-duty machine for large-scale operations, John Deere offers a tractor model suited to your specific requirements. These tractors have advanced features like high-performance engines, ergonomic controls, and precision agriculture tools that help optimize productivity and efficiency.
John Deere continues to innovate, integrating intelligent technologies like GPS guidance and telematics systems to make farming more efficient and environmentally friendly. Farmers, landscapers, and construction professionals trust John Deere for their long-term durability and ability to handle harsh conditions.
Importance of Tire Alignment in John Deere Tractors
Proper tire alignment is crucial for maximizing the performance and longevity of John Deere tractors. It might seem like a minor detail, but the effects of misalignment can lead to significant issues over time. Here are several reasons why maintaining proper tire alignment is essential for these machines:
- Improved Handling and Control
When the tires of a John Deere tractor are correctly aligned, the vehicle responds better to steering inputs. This improved handling is critical when navigating uneven terrain, sharp turns, or working in tight spaces. Proper alignment ensures the tractor moves in the intended direction, making operating more accessible and safer.
- Reduced Tire Wear
Misaligned tires can lead to uneven wear patterns, causing some areas of the tire to wear out faster than others. This not only shortens the lifespan of the tires but can also lead to the need for premature replacements. Proper alignment ensures that tires wear evenly, maximizing lifespan and reducing maintenance costs.
- Enhanced Fuel Efficiency
Proper tire alignment can significantly impact fuel efficiency. When tires are misaligned, the tractor has to work harder to maintain speed and direction, leading to increased fuel consumption. Ensuring that your John Deere tractor’s tires are properly aligned can improve fuel efficiency and reduce operating costs over time.
- Better Traction
Alignment affects how the tractor’s tires make contact with the ground. Misalignment can reduce traction, particularly in challenging conditions like muddy or uneven terrain. Correctly aligned tires provide optimal contact with the ground, enhancing traction and improving overall performance.
- Smoother Ride
When tires are aligned correctly, the ride becomes smoother. This is particularly important during long hours of operation, as a smoother ride reduces operator fatigue. A comfortable driving experience can increase productivity, allowing you to focus on the tasks rather than battling with an uncomfortable ride.
Tools Needed for Tire Alignment on John Deere Tractors
Proper tire alignment for John Deere tractors requires specific tools to ensure accuracy and effectiveness. Here’s a list of essential tools needed for tire alignment, along with a brief description of each:
1. Alignment Tool or Kit
- Description: Specialized alignment tools or kits are designed to measure the angles of the tires and determine alignment. These kits often include toe plates, camber gauges, and measurement tapes.
- Purpose: To accurately measure toe, camber, and caster angles for proper alignment adjustments.
2. Tire Pressure Gauge
- Description: A simple tool used to check the air pressure in the tires.
- Purpose: Ensures that tires are inflated to the manufacturer’s recommended pressure, which is crucial for accurate alignment.
3. Wrench Set
- Description: A set of various-sized wrenches (both standard and metric).
- Purpose: Used for loosening and tightening bolts and nuts during alignment.
4. Jack and Jack Stands
- Description: A hydraulic or mechanical jack to lift the tractor, along with jack stands to support it securely.
- Purpose: Provides access to the tires and suspension components for adjustment.
5. Level
- Description: A standard bubble level or digital level.
- Purpose: Ensures the tractor is level before measurements are taken, which is essential for accurate alignment.
6. Camber Gauge
- Description: A tool specifically designed to measure the camber angle of the tires.
- Purpose: Helps adjust the camber to the correct specifications for better tire wear and handling.
7. Toe Alignment Tool
- Description: This can be a specialized tool or simple strings stretched between the front and rear tires to measure toe-in or toe-out.
- Purpose: To measure the distance between the front and rear of the tires to adjust toe angle accurately.
8. Impact Wrench
- Description: A power tool that provides high torque to loosen or tighten nuts and bolts quickly.
- Purpose: Speeds up the process of making adjustments to the alignment settings.
9. Measuring Tape
- Description: A standard measuring tape.
- Purpose: Used for measuring distances and ensuring the alignment specifications are met.
10. Chalk or Marker
- Description: A piece of chalk or a washable marker.
- Purpose: To mark tire positions and measurements to keep track of adjustments.
Essential Tools Overview for Tire Alignment on John Deere Tractors
Proper tire alignment is vital for the performance and longevity of your John Deere tractor. Using the right tools is essential for achieving accurate alignment adjustments. Here’s an overview of the vital tools needed for tire alignment, along with their key features and purposes:
| Tool | Description | Purpose |
|---|---|---|
| Alignment Tool or Kit | Specialized tools or kits, often including toe plates and camber gauges. | Measure angles of the tires (toe, camber, caster) for adjustments. |
| Tire Pressure Gauge | A tool for measuring the air pressure in tires. | Ensure tires are inflated to the recommended pressure for accurate alignment. |
| Wrench Set | A collection of various-sized wrenches (standard and metric). | Loosen and tighten bolts and nuts during alignment adjustments. |
| Jack and Jack Stands | A hydraulic or mechanical jack with stands to lift and support the tractor. | Provide access to tires and suspension for adjustments. |
| Level | A bubble or digital level to check the horizontal alignment. | Ensure the tractor is level for accurate measurements. |
| Camber Gauge | A tool specifically designed to measure the camber angle. | Adjust camber to correct specifications for better tire wear and handling. |
| Toe Alignment Tool | A specialized tool or strings are used to measure toe angles. | Measure toe-in or toe-out distances for precise adjustments. |
| Impact Wrench | A power tool that delivers high torque for quick nut and bolt adjustments. | Speed up the process of making alignment adjustments. |
| Measuring Tape | A standard measuring tape for distance measurement. | Ensure alignment specifications are met accurately. |
| Chalk or Marker | A piece of chalk or washable marker for marking measurements. | Keep track of tire positions and alignment adjustments. |
Preparing Your Tractor for Tire Alignment
Preparing your tractor for tire alignment involves several essential steps that ensure accuracy and effectiveness. First, start by selecting a level surface where you can perform the alignment. A flat area will help you obtain accurate measurements. Next, gather all the necessary tools, including an alignment tool, tire pressure gauge, wrenches, and a jack. Having everything ready will streamline the process and save you time.
After you have all the tools, check the tire pressure in each tire. You should ensure that they are inflated to the manufacturer’smanufacturer’s recommended levels. Proper tire pressure plays a critical role in achieving accurate alignment. If any tires are under-inflated or over-inflated, adjust them accordingly before proceeding. This step helps prevent further alignment issues and promotes even tire wear.
Once the tires are at the correct pressure, lift the tractor off the ground with a jack. Ensure you securely place jack stands under the tractor for safety. This lifting allows you to access the tires and suspension components easily. After elevating the tractor, inspect the tires for visible damage or excessive wear. Look for uneven wear patterns, indicating alignment problems that must be addressed.
Next, use the alignment tool to measure the tire angles. Follow the manufacturer’smanufacturer’s instructions to check the toe, camber, and caster angles. You should make sure these angles fall within the recommended specifications. If any angles are out of alignment, adjust them using your wrench set. This adjustment helps improve handling and reduces tire wear.
After completing the alignment measurements, double-check all adjustments to ensure they are secure. This confirmation is vital for maintaining alignment and preventing future issues. Finally, lower the tractor back and take it for a test drive.
Measuring Tire Alignment
Measuring tire alignment is crucial in maintaining your tractor’s performance and longevity. Proper alignment ensures optimal tire wear, improved handling, and enhanced fuel efficiency. Here’s a step-by-step guide on accurately measuring tire alignment on your John Deere tractor.
- Gather Your Tools
Before you start, ensure you have all the necessary tools. You will need an alignment tool or kit, a measuring tape, a level, and a camber gauge. Having everything ready will help streamline the measurement process.
- Prepare the Tractor
First, park your tractor on a level surface to ensure accurate measurements. You should lift the tractor using a jack and securely place jack stands underneath for safety. This step provides easy access to the tires and suspension components.
- Check Tire Pressure
Next, use a tire pressure gauge to check the pressure in each tire. Inflate the tires to the manufacturer’s recommended levels. Proper tire pressure is vital for accurate alignment measurements.
- Measure Toe Angle
Place the alignment tool on the front tires to measure the toe angle. Follow the tool’s instructions to ensure accurate positioning. Use a measuring tape to measure the distance between the front edges of the tires and then the rear edges. Calculate the difference between these measurements. If the front measurement is smaller than the rear, the tires are toed out; if more extensive, they are toed in. Adjust the toe angle as needed.
- Measure Camber Angle
For camber measurement, attach a camber gauge to the tire. The indicator should rest against the tire’s side. Record the angle displayed on the indicator. Adjust the camber accordingly if the angle falls outside the manufacturer’s specifications.
Adjusting the Tie Rods on Your Tractor
Adjusting the tie rods is vital in achieving proper tire alignment on your tractor. Tie rods connect the steering mechanism to the wheels, ensuring they turn simultaneously and correctly. To begin, gather your tools, including a wrench set, a measuring tape, and an alignment tool.
First, park your tractor on a level surface and securely lift it with a jack. Once elevated, check the current alignment measurements for the toe angle. If adjustments are necessary, locate the tie rods at the front of the tractor. Loosen the lock nuts on both ends of each tie rod using your wrench set.
Next, turn the tie rods to adjust their length. Shorten the tie rods for toe-in alignment lengthen them for toe-out alignment. After making the adjustments, recheck the toe angle using your alignment tool to ensure it meets the manufacturer’s specifications.
Once satisfied with the adjustments, tighten the lock nuts securely. Finally, lower the tractor and take it for a test drive to verify the steering response. Regularly adjusting the tie rods helps maintain optimal handling and tire wear, ensuring your tractor performs efficiently.
Checking Camber and Caster on Your Tractor
Checking your tractor’s camber and caster angles is essential for maintaining optimal tire performance and handling. These angles affect how your tractor’s wheels contact the ground, influencing traction and stability. Here’s a detailed guide on how to check camber and caster effectively.
First, gather your tools. You will need a camber gauge, an alignment tool, a level, and a measuring tape. Having everything ready will streamline the process. Next, park your tractor on a flat surface to ensure accurate measurements. After providing the secure tractor, use a jack to lift it and place jack stands underneath for safety.
Once the tractor is elevated, begin with the camber check. Attach the camber gauge to the side of one front tire. As you do this, ensure the gauge is level to obtain accurate readings. Record the angle displayed on the indicator. You must make adjustments if the angle falls outside the manufacturer’s specifications. Generally, a slight positive camber improves handling, while a slight negative camber can enhance cornering stability.
After checking the camber, move on to the caster measurement. To measure the caster, turn the steering wheel slightly to one side. This movement will help you determine the angle of the steering axis. Use the alignment tool to check the caster angle on both front wheels. It is crucial to compare these readings, as uneven caster angles can lead to handling issues.
If you find that either the camber or caster angles are out of alignment, adjust them accordingly. Adjusting the camber typically involves modifying the upper control arms, while caster adjustments may require repositioning the control arms or tie rods. After making adjustments, always recheck both angles to ensure they meet the specifications.
Testing Alignment Accuracy on Your Tractor
- Initial Setup
First, park your tractor on a level surface. This step is essential for accurate measurements. Ensure the tires are correctly inflated to the manufacturer’s recommended pressure, which can significantly affect alignment readings. Next, gather your tools, including an alignment tool or kit, measuring tape, and a level.
- Check Toe Angle
Begin by measuring the toe angle. Use the alignment tool to measure the distance between the front and rear edges of the tires. For accurate results, measure both sides and compare the readings. If the front distance is smaller than the rear, the tires are toed out; if more extensive, they are toed in. Adjust the tie rods accordingly to achieve the desired toe angle, which typically should be slightly toed in for stability.
Verify Camber and Caster
After adjusting the toe angle, check the camber and caster angles using the appropriate gauges. For the camber, attach the gauge to the side of each tire and ensure the readings align with the manufacturer’s specifications. For the caster, turn the steering wheel slightly and measure the angle of the steering axis on both wheels. Compare the readings to ensure they are even; discrepancies may indicate misalignment.
- Test Drive
Once you have adjusted all angles, lower the tractor and take it for a test drive. Pay attention to how the tractor handles during various maneuvers, such as turning and stopping. The steering should feel responsive, and the tractor should track straight without pulling to one side. If you notice any handling issues, you may need to revisit the alignment measurements and make further adjustments.
Visual Inspection Techniques for Tractor Alignment
A visual inspection is essential for maintaining your tractor’s alignment and ensuring optimal performance. Start by examining all four tires for uneven wear patterns, such as bald spots on the inner or outer edges.
These patterns often indicate misalignment issues; for instance, more wear on the inner edges may suggest excessive camber, while wear on the outer edges can point to a toe-out condition. While inspecting the tires, use a tire pressure gauge to ensure each tire is properly inflated. Under-inflated tires can exacerbate alignment problems, leading to increased wear and compromised handling.
Next, closely examine the tie rods and steering components, checking for visible damage such as bends, cracks, or excessive play. Damaged tie rods can significantly impact alignment and steering accuracy. Additionally, inspect the suspension system, including control arms, bushings, and ball joints, for signs of wear, cracks, or leaks. Damaged suspension parts can affect alignment and overall vehicle stability.
With the tractor on a flat surface, visually assess whether it sits level; an uneven stance can indicate suspension or alignment issues. Lastly, examine the wheel positioning relative to the tractor body. Both front wheels should point in the same direction and parallel to the rear wheels. If one wheel appears misaligned, it could indicate a toe or camber issue that requires adjustment. By incorporating these visual inspection techniques into your maintenance routine, you can identify potential alignment issues early and keep your tractor operating smoothly.
Measuring Wheel Angles on Your Tractor
Measuring wheel angles is a crucial step in ensuring proper alignment and optimal performance for your tractor. The three primary angles to measure are toe, camber, and caster. Each of these angles affects how your tractor handles and wears its tires.
Start with the toe angle. Position your tractor on a flat surface to measure the toe and ensure the tires are properly inflated. Use an alignment tool or measuring tape to measure the distance between the front edges of the front tires and then the rear edges. If the front measurement is smaller than the rear, the wheels are toed out; if it’s larger, they are toed in. Ideally, a slight toe-in enhances stability and handling.
Next, measure the camber angle. Attach a camber gauge to the side of one tire, ensuring it’s level. Record the angle displayed on the gauge. The camber angle indicates how the tire leans relative to the vertical axis. A slight negative camber often improves cornering stability, while excessive negative camber can lead to uneven tire wear.
Finally, check the caster angle. Turn the steering wheel slightly to one side and use an alignment tool to measure the angle of the steering axis on both front wheels. Ensure that the readings are even, as discrepancies may indicate misalignment.
After measuring all three angles, compare your findings to the manufacturer’s specifications. If any angles fall outside these parameters, make the necessary adjustments. Regularly measuring wheel angles helps maintain optimal tractor performance, extends tire life, and ensures safe operation. You can enjoy a smoother and more efficient driving experience by staying proactive with your measurements.
Adjusting Tire Pressure on Your Tractor
Adjusting tire pressure is a critical maintenance task that significantly impacts your tractor’s performance, handling, and tire longevity. Properly inflated tires ensure optimal traction and fuel efficiency and reduce the risk of tire damage. Here’s a step-by-step guide on how to adjust tire pressure effectively.
First, gather your tools. You will need a reliable tire pressure gauge and an air compressor or manual pump. Having everything on hand will streamline the process. Next, park your tractor on a level surface to ensure accurate readings. After positioning the tractor, wait a few minutes to allow any heat generated during the operation to dissipate; this will help you get a more accurate tire pressure reading.
Once the tractor is stationary, use the tire pressure gauge to check each tire’s pressure. Remove the valve cap from the tire, press the gauge onto the valve stem, and note the reading. Compare this measurement to the manufacturer’s recommended tire pressure, usually found on a label on the tractor or in the owner’s manual.
If the tire pressure is too low, use an air compressor or manual pump to inflate the tire. Inflate it gradually, frequently checking the pressure until it reaches the recommended level. Conversely, if the tire pressure is too high, release some air by pressing on the valve stem with a small tool until you achieve the desired pressure.
Finally, replace the valve caps securely on each tire and double-check the pressure again. Regularly adjusting and monitoring tire pressure can significantly enhance your tractor’s performance, increase tire lifespan, and improve overall safety during operation. Incorporating this simple maintenance task into your routine ensures your tractor runs smoothly and efficiently.
Regular Maintenance Tips for Your Tractor
Regular maintenance is essential for ensuring your tractor’s longevity, performance, and safety. Start by checking the tire pressure at least once a month and before each use, especially after long periods of inactivity. Properly inflated tires enhance traction, improve fuel efficiency, and extend tire life. Additionally, conduct visual inspections for signs of uneven wear, cracks, or bulges, and replace tires that show significant wear. Rotating tires as recommended will also help ensure even wear and better performance.
Changing the engine oil and filters regularly is crucial for engine health. Follow the manufacturer’s guidelines, typically every 100-200 hours of operation, to prevent premature wear. Additionally, inspect and clean or replace the air filter to ensure proper engine airflow, improving efficiency.
Regularly check fluid levels, including coolant, hydraulic, and transmission fluid, ensuring they are at the proper levels and contaminants-free. Inspect belts for wear and check hoses for leaks; replace any damaged components to avoid costly repairs. Lubricating moving parts, such as joints and pivot points, will help reduce friction and wear.
Don’t forget battery maintenance: check for corrosion on the terminals and ensure it is securely mounted. Test the battery regularly, especially before the operational season. Lastly, adjust your maintenance routine according to the seasons. Prepare your tractor for winter by adding fuel stabilizer, changing the oil, and checking antifreeze levels.
By incorporating these regular maintenance tips, you can keep your tractor running smoothly, extend its lifespan, and enhance its overall performance.
Conclusion
Maintaining your John Deere tractor is essential for ensuring optimal performance, longevity, and safety. Regular tasks, such as checking tire pressure, inspecting for wear, changing oil, and monitoring fluid levels, are critical for keeping your tractor in top shape. Additionally, understanding the importance of alignment and knowing how to measure and adjust wheel angles can significantly impact your tractor’s handling and fuel efficiency.
By incorporating routine maintenance and addressing common alignment issues, you can prevent costly repairs and enhance your tractor’s operational efficiency. Always stay proactive about your maintenance checks, refer to your owner’s manual for specifications, and don’t hesitate to seek professional assistance when needed. By prioritizing these practices, you can enjoy a smoother, more efficient driving experience with your John Deere tractor, ensuring it serves you well for many years.
Common Questions About Alignment in John Deere Tractors
- What are the signs of misalignment in my John Deere tractor? Misalignment can manifest through uneven tire wear, pulling to one side while driving, or a crooked steering wheel. You may also notice decreased handling performance or increased vibration during operation.
- How often should I check the alignment on my tractor? It’s recommended to check the alignment every 100 hours of operation or whenever you notice any handling issues. Additionally, inspect alignment after significant impacts, such as hitting a curb or deep potholes.
- What tools do I need to measure alignment? You’ll need basic tools such as a tape measure, an alignment tool or gauge, and possibly a level to measure alignment accurately. These tools help you assess toe, camber, and caster angles effectively.
- Can I adjust the alignment myself? You can adjust the alignment yourself if you have the right tools and knowledge. However, if you are unsure or uncomfortable with the process, it is advisable to seek professional help to ensure proper alignment.
- What are the correct alignment specifications for John Deere tractors? Alignment specifications can vary based on the specific model of your tractor. Always refer to the owner’s manual or manufacturer guidelines for your particular model’s correct toe, camber, and caster angles.
- Does misalignment affect fuel efficiency? Yes, misalignment can negatively impact fuel efficiency. When tires are not aligned correctly, they create additional friction and drag, forcing the engine to work harder and consume more fuel.
- How can I prevent alignment issues in my tractor? To prevent alignment issues, avoid hitting obstacles and make smooth turns. Regularly check and maintain tire pressure, and perform routine visual inspections to catch potential problems early.


