Introduction
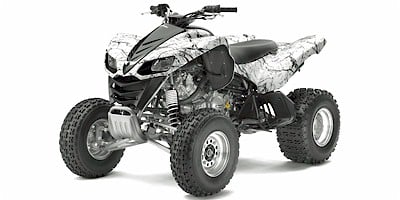
The Kawasaki KFX 700 is a robust and high-performance sport ATV, designed to provide thrilling off-road experiences for riders. With its powerful V-twin engine and automatic transmission, it stands out as a favorite for those seeking speed and reliability. However, like any machine, the KFX 700 has its share of issues that can arise over time. Fortunately, most of these problems are relatively easy to fix, making the KFX 700 accessible for both novice and experienced riders to maintain. In this guide, we’ll highlight some of the common problems riders encounter and provide straightforward solutions to keep your ATV running smoothly.
Kawasaki KFX 700 Specifications Table
| Specification |
Details |
| Model |
Kawasaki KFX 700 |
| Engine Type |
697cc, 4-stroke, V-twin engine |
| Transmission |
Automatic CVT |
| Horsepower |
Approximately 45 hp |
| Cooling System |
Liquid-cooled |
| Fuel System |
Dual Keihin CVKR-D32 Carburetors |
| Ignition System |
CDI (Capacitor Discharge Ignition) |
| Drive Type |
Shaft drive |
| Suspension (Front/Rear) |
Independent A-arm / Swingarm |
| Brake Type (Front/Rear) |
Hydraulic Disc |
| Tire Size (Front/Rear) |
22×7-10 / 22×10-10 |
| Seat Height |
33.5 inches |
| Fuel Tank Capacity |
3.2 gallons |
| Dry Weight |
516 lbs |
| Years of Production |
2004 – 2009 |
This table provides a quick reference to the technical specifications of the KFX 700, serving as a foundation to understand its common issues and how to address them efficiently.
My Personal Experience with the Kawasaki KFX 700
When I first laid eyes on the Kawasaki KFX 700, I knew I was in for a treat. This ATV is a beast in its own right, boasting a 697cc V-twin engine that immediately caught my attention. As someone who loves the thrill of off-roading, I was eager to see how it would handle on rough trails and open terrain. After several months of riding it across various conditions—from muddy trails to open fields and rocky hills—I can confidently say the KFX 700 has its quirks, but it also delivers a thrilling ride that’s hard to match.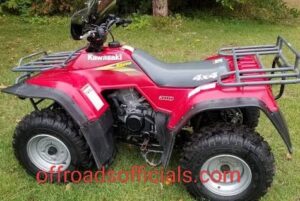
Performance and Power
The first time I revved up the engine, I was impressed by the throaty roar and the sheer power at my fingertips. The V-twin engine produces around 45 horsepower, which might not sound like a lot by today’s standards, but for a sport ATV, it’s more than enough to push you back into the seat when you punch the throttle. The automatic CVT transmission is smooth, making it easy to focus on the terrain rather than shifting gears constantly. I found this especially useful when navigating tricky off-road paths.
On straightaways, the KFX 700 can really stretch its legs. There’s a satisfying surge of acceleration that keeps you planted, and it handles surprisingly well at high speeds. However, where the KFX 700 truly shines is in its torque. The low-end grunt is perfect for conquering steep inclines or powering through deep mud without breaking a sweat.
Handling and Ride Quality
One thing I immediately noticed was the weight of the machine. At over 500 pounds, the KFX 700 isn’t exactly light. Yet, Kawasaki managed to distribute that weight well, and once you get used to it, the ATV feels stable and planted. The front suspension consists of independent A-arms, while the rear uses a swingarm setup. This combination provides a decent balance between comfort and control, but it’s not the smoothest ride you’ll find. When riding through rough, uneven trails, I could feel the bumps a bit more than I would on a lighter sport quad.
That said, the stability is excellent, and I rarely felt like I was losing control, even when hitting unexpected ruts or obstacles. The steering is responsive, though a bit heavy compared to other sport ATVs. It took some getting used to, but once I adapted, I found the handling to be predictable and confidence-inspiring.
Design and Comfort
The design of the KFX 700 is classic Kawasaki—rugged, muscular, and built to handle abuse. I appreciated the ergonomic layout; the seating position is comfortable for extended rides, and there’s plenty of room to shift around when tackling technical sections. However, at 33.5 inches, the seat height might be a bit tall for shorter riders, so keep that in mind if you’re considering one.
What stood out to me was the storage space. With a small cargo area behind the seat, the KFX 700 can actually carry a few essentials, which came in handy more often than I expected. Whether it was a toolkit, a water bottle, or a few snacks, it’s nice to have that extra bit of functionality in an ATV primarily designed for fun.
Common Issues and Easy Fixes
No ATV is perfect, and the KFX 700 is no exception. After putting in some serious hours on the trails, I did encounter a few minor issues. The most common one was the overheating problem, especially during long rides in warmer weather. The solution turned out to be straightforward: keeping the radiator clean and using a high-quality coolant mix significantly reduced the overheating.
Another issue I faced was the occasional belt slipping in the CVT transmission. I quickly realized that proper belt tension and regular inspection can prevent this from becoming a serious problem. It’s an easy fix that just requires a bit of attention, but if left unchecked, it can lead to performance dips or even damage to the transmission.
The carburetors also need regular tuning. I noticed a drop in performance when they started getting clogged with dirt. Cleaning them out and adjusting the air-fuel mixture restored the power and made the engine run smoother.
10 Common Kawasaki KFX 700 Problems and Easy Fixes (Detailed)
1. Overheating Issues
Symptoms of Overheating
- Engine temperature gauge reading high.
- Coolant boiling or overflowing from the radiator.
- Engine shutting off suddenly, especially during low-speed rides.
Causes of Overheating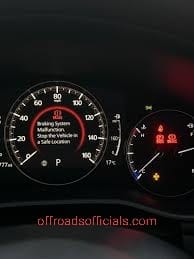
Overheating in the Kawasaki KFX 700 is a common issue, especially if the radiator is clogged or the coolant is not circulating properly. The engine’s cooling system, which includes the radiator, fan, and coolant, is responsible for keeping the engine temperature at an optimal level. When any of these components fail, the engine starts to overheat.
How to Diagnose Overheating
First, check the radiator for debris, mud, or grass blocking the fins, as this restricts airflow. A clogged radiator can be cleaned using a low-pressure hose or compressed air. Next, check the coolant levels and inspect for leaks around the hoses or fittings. If the coolant level is low, refill it with a high-quality mixture of water and coolant in a 50:50 ratio. Additionally, test the fan relay and temperature sensor to ensure the cooling fan is operating correctly.
Fixing Overheating Problems
To fix overheating, thoroughly clean the radiator and ensure all coolant lines are free of obstructions. If the fan isn’t turning on, replace the fan relay or the temperature sensor. In some cases, upgrading to a more efficient aftermarket radiator or installing an auxiliary fan can help manage temperatures during extreme riding conditions.
2. CVT Belt Slipping
What is CVT Belt Slipping?
The KFX 700’s Continuously Variable Transmission (CVT) uses a belt-driven system to transfer power from the engine to the wheels. Over time, the belt can become worn, loose, or glazed, causing it to slip. This results in a loss of acceleration and poor power delivery.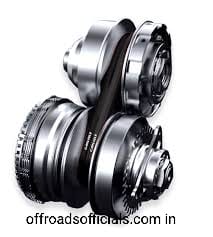
Symptoms of Belt Slipping
- High engine RPMs without corresponding speed increase.
- A burning rubber smell near the CVT housing.
- Jerky or sluggish acceleration.
How to Inspect the Belt
Remove the CVT cover to access the belt and visually inspect it for signs of wear, such as cracks, glazing, or fraying. Measure the width of the belt; if it’s below the manufacturer’s specifications, it’s time to replace it. Also, check the condition of the pulleys for any dirt or damage.
Replacing the CVT Belt
To replace the belt, loosen the tensioner and remove the old belt. Install a new belt, ensuring it’s properly seated on the pulleys. Tighten the tensioner to the recommended specification. Regular belt inspections and timely replacements are key to avoiding this problem in the future.
3. Carburetor Clogging and Poor Throttle Response
Understanding Carburetor Issues
The KFX 700 features dual Keihin carburetors that precisely control the air-fuel mixture. When dirt or debris clogs them, the mixture ratio gets thrown off, resulting in poor performance and throttle response.This can cause symptoms like rough idling, poor acceleration, or even engine stalling.
Causes of Carburetor Clogging
The primary cause of carburetor clogging is contaminated fuel or dirt entering the carburetor through the air intake. This can happen if the air filter is not properly maintained or if the ATV is stored without draining the carburetors.
Cleaning the Carburetors
To clean the carburetors, first, remove them from the ATV and disassemble them carefully. Use a carburetor cleaner to remove deposits and clear out any blockages in the jets and passages. Pay special attention to the pilot and main jets, as these are the most likely to clog.
Preventing Future Clogs
Regularly check and replace the air filter, and always use clean, fresh fuel. Adding a fuel stabilizer can help prevent gumming when the ATV is stored for long periods.
4. Starter Motor Failure
Symptoms of a Failing Starter Motor
- Clicking sound when the start button is pressed.
- Slow engine cranking or complete failure to turn over.
- Intermittent starting problems.
Why the Starter Motor Fails
The starter motor consists of several components, including brushes, bearings, and the solenoid. Over time, these components wear out, leading to poor electrical contact or mechanical failure. Another common cause is a weak battery, which doesn’t provide enough power for the motor to turn over.
Diagnosing the Issue
Begin by testing the battery to ensure it has a full charge. Next, check the starter solenoid for continuity. If the solenoid clicks but the motor doesn’t turn, the issue is likely with the starter itself.
Fixing the Starter Motor
Rebuilding the starter motor by replacing the brushes and bearings is often a cost-effective fix. However, if the internal windings are damaged, it’s best to replace the entire starter motor.
5. Fuel Pump Failure
Understanding Fuel Pump Problems
The KFX 700 uses a mechanical fuel pump to deliver gasoline to the carburetors. Over time, the diaphragm inside the pump can become stiff or cracked, leading to inadequate fuel delivery. This results in symptoms like sputtering, difficulty starting, or the engine cutting out.
Symptoms of a Failing Fuel Pump
- Engine struggles to start, especially after sitting for a while.
- Poor performance under load or at high RPMs.
- Fuel not reaching the carburetors when the engine is cranked.
Diagnosing and Fixing the Problem
To check for fuel pump issues, disconnect the fuel line at the carburetor and crank the engine. If there’s no steady fuel flow, the pump needs to be replaced. Replace the diaphragm or the entire fuel pump, and check the fuel lines for cracks or leaks.
6. Exhaust Pipe Cracking
Why the Exhaust Pipe Cracks
The exhaust pipe on the KFX 700 is subjected to extreme heat and vibrations. Over time, the metal can develop cracks, especially at the weld joints. This can lead to increased exhaust noise, reduced performance, and even exhaust leaks.
How to Identify Cracks
Look for visible cracks or black soot marks around the joints and welds of the exhaust pipe. If you notice excessive noise or a loss of backpressure, it’s a clear sign that the pipe is compromised.
Repairing or Replacing the Exhaust
For minor cracks, welding is a quick fix. Use a high-temperature-resistant welding material to ensure a long-lasting repair. If the damage is extensive, consider replacing the exhaust system. After repairs, coat the exhaust with high-heat paint to prevent rust and further damage.
7. Rear Axle Bearing Wear
What Causes Rear Axle Bearings to Wear Out?
The rear axle bearings endure heavy loads, especially when the ATV is ridden hard over rough terrain. Over time, they can develop play or become noisy, making the ride unstable.
Symptoms of Worn Bearings
- Excessive side-to-side wheel movement.
- Continuous Vibration or Rattle from Rear Axle”.
- Wobbling sensation at higher speeds.
Replacing the Bearings
To replace worn bearings, remove the rear wheels and axle. Press out the old bearings and install new ones, making sure they’re properly seated and greased. Use high-quality bearings to ensure durability and performance.
8. Brake Pad Wear
Understanding Brake Pad Wear
The KFX 700’s hydraulic disc brakes are highly effective, but the pads can wear down quickly, especially under aggressive riding conditions. Worn pads reduce braking performance and can damage the rotors.
Symptoms of Worn Brake Pads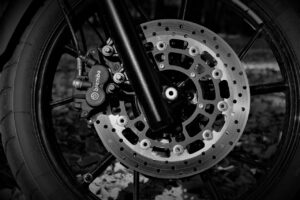
- Squealing or grinding noise during braking.
- Increased stopping distance.
- Uneven brake pad wear.
Replacing Brake Pads
Inspect the pads regularly and replace them if they’re less than 1/8th of an inch thick. Remove the caliper, swap in new pads, and check the rotor for grooves or warping.
9. Electrical Shorts and Faulty Wiring
Common Electrical Problems
Electrical shorts are often caused by damaged or corroded wires. Moisture, dirt, and vibration can wear out the insulation, leading to intermittent power loss or flickering lights.
Diagnosing Electrical Issues
Check the wiring harness for visible damage. Always try to Use a multimeter to check for continuity and resistance. Pay special attention to areas where the wires pass through the frame or are near moving components.
Fixing the Wiring
Repair frayed wires with solder and heat-shrink tubing. For severe damage, replace the entire harness.
10. Ignition Coil Failure
Symptoms of a Bad Ignition Coil
- Difficulty starting.
- Misfiring or poor acceleration.
- Engine stalling or running rough.
Testing and Replacing the Ignition Coil
Use a multimeter to check the resistance values. If the readings are outside the normal range, replace the coil. This is a simple fix that can restore engine performance.
Final Thoughts
Overall, the Kawasaki KFX 700 is a solid machine that delivers plenty of power and excitement. While it’s not without its flaws, most of the issues I encountered were easily manageable with basic tools and a bit of mechanical know-how. For anyone looking for a sport ATV that can handle both casual trail rides and more aggressive off-roading, the KFX 700 is a worthy choice.
Its powerful engine, automatic transmission, and robust build make it a great option for riders who want something fast and durable without having to worry about constant maintenance. Personally, I’ve enjoyed every minute on it, and despite its quirks, it’s become one of my go-to ATVs for all types of riding.
Frequently Asked Questions (FAQs) about Kawasaki KFX 700
1. Why Does My Kawasaki KFX 700 Overheat Frequently?
The most common reason for overheating in the KFX 700 is a clogged radiator or low coolant levels. Dirt, mud, and debris can block the radiator fins, preventing proper airflow. Additionally, using an incorrect coolant mix or a failing cooling fan can exacerbate the problem. Regularly clean the radiator, use a high-quality coolant in a 50:50 ratio, and inspect the fan relay and temperature sensor to ensure everything is functioning correctly.
2. What Should I Do if My KFX 700 Loses Power or Feels Sluggish?
If your KFX 700 feels sluggish or lacks power, it’s often due to a slipping CVT belt or a clogged carburetor. For a slipping belt, check for wear or glazing and replace it if necessary. If the problem is with the carburetor, remove and clean it thoroughly using a carb cleaner to restore proper air-fuel mixture. Also, ensure the air filter is clean and not restricting airflow.
3. How Do I Fix a Starting Issue with My KFX 700?
Weak batteries, faulty starter motors, and bad ignition coils can cause starting issues. First, check the battery to ensure it’s fully charged. If the battery is fine, inspect the starter motor for worn brushes or poor connections. A clicking sound when starting usually indicates a failing starter solenoid. If all else fails, check the ignition coil using a multimeter and replace it if the resistance readings are off.
4. What Can I Do to Prevent My Carburetors from Clogging?
To prevent carburetor clogging, regularly clean or replace the air filter, use high-quality fuel, and add a fuel stabilizer if the ATV will be sitting for extended periods. Clogging typically occurs due to dirt and debris entering the carburetor or from stale fuel gumming up the jets. Periodically disassemble and clean the carburetors to ensure smooth throttle response and optimal engine performance.
5. Why is My KFX 700’s Rear End Making a Grinding Noise?
A grinding noise from the rear end is usually a sign of worn rear axle bearings. Over time, the bearings wear out due to the heavy loads they endure, especially in rough terrain. To fix this, remove the rear axle, press out the old bearings, and install new ones. Make sure to properly grease the new bearings to ensure smooth operation and prevent future wear.
6. What Should I Do if My Exhaust is Louder than Usual?
If your exhaust suddenly becomes louder, it’s likely due to a crack or hole in the exhaust pipe. Exhaust cracks are common around the weld joints due to high heat and vibration. To fix this, inspect the exhaust for visible cracks and either weld the damaged area or replace the pipe entirely. Applying a high-heat-resistant paint after repairs will help prevent rust and further damage.
7. How Can I Troubleshoot Electrical Problems on My KFX 700?
Electrical problems, such as intermittent power loss or flickering lights, are often caused by faulty wiring or corroded connections. Start by inspecting the wiring harness for frayed wires, loose connectors, or corrosion. Use a multimeter to check for continuity and repair any damaged sections with solder and heat-shrink tubing. For severe wiring damage, consider replacing the entire harness to prevent recurring issues.


